- Anyone have a trick for getting Husqvarna chainsaw brake kickback spring back on? - 17 Updates
- Total Ripoff Pioneer Spares - 3 Updates
- CATV RF Notch Filter - 2 Updates
- Nobody Would Ever Figure This One (amp) - 1 Update
- Car alternator failure -- twice! - 2 Updates
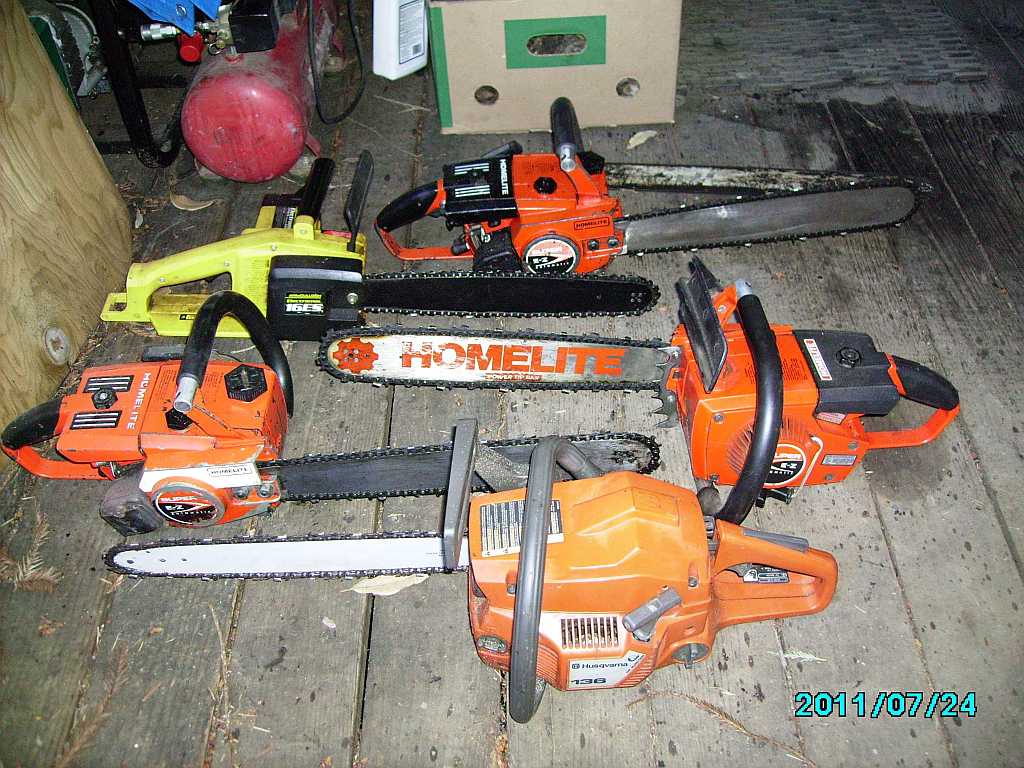
| Jeff Liebermann <jeffl@cruzio.com>: Feb 19 08:47AM -0800 On Thu, 19 Feb 2015 02:52:28 +0000 (UTC), "Danny D." >So I lent him my Husqvarna 18" chainsaw for chopping up the fallen trees: > https://c4.staticflickr.com/8/7455/16388696590_ca981a9d47_z.jpg Model number please? Looks familiar: <http://802.11junk.com/jeffl/crud/chain-saws.jpg> <http://802.11junk.com/jeffl/crud/Husqvarna-136-chain-saw.pdf.jpg> Here's a video on how to do it: <https://www.youtube.com/watch?v=gK7eKakMCz8> He just uses a pair of big needle nose pliers and brute force. -- Jeff Liebermann jeffl@cruzio.com 150 Felker St #D http://www.LearnByDestroying.com Santa Cruz CA 95060 http://802.11junk.com Skype: JeffLiebermann AE6KS 831-336-2558 |
| "Tom Miller" <tmiller11147@verizon.net>: Feb 19 02:51PM -0500 "Stormin Mormon" <cayoung61@hotmail.com> wrote in message news:tflFw.1774930$UR.790033@fx04.iad... > learn more about Jesus > . www.lds.org > . Sorry, I did not explain it clear enough for you to understand. The bolt is outside of the spring. A tab on the edge of the washer goes to the inside of the spring. There might be better solutions that one could explore. |
| "Danny D." <dannydiamico@gmail.com>: Feb 19 08:35PM Jeff Liebermann wrote, on Thu, 19 Feb 2015 08:47:48 -0800: > Here's a video on how to do it: > <https://www.youtube.com/watch?v=gK7eKakMCz8> > He just uses a pair of big needle nose pliers and brute force. Hi Jeff, It's the Husqvarna 445, from the local Lowes and it's about a year old. My neighbor, who is building that suspension bridge here in the redwoods in your neck of the woods (a bit further north than you), borrowed it, and chopped up a nice hard madrone (lovely wood) that had fallen in the last pineapple express. You probably lost a few antennas in recent weeks (we did). Anyway, the video was very helpful. I'm amazed you actually found that video, because it's EXACTLY what I need to do! You're utterly amazing, and I don't say that all too lightly. The video makes it look all so easy, but doesn't mention how fantastically strong that spring is, and, that it flies out all over the place (ask me how I know)... I like the trick of bolting down a hold-down clamp, as that spring has already bounced all over my garage this morning ... |
| "Danny D." <dannydiamico@gmail.com>: Feb 19 08:41PM Stormin Mormon wrote, on Thu, 19 Feb 2015 08:08:56 -0500: > I'll admit, I only looked at one or two. > But, the bolt thing won't do much good > here. Chris understood. There's no room, really, for a "spring compressor". I've done McPherson struts, and, this is NOTHING like that since any flimsy metal that fits between the spring coils is NEVER gonna compress that spring. If you held that spring in between your fingers, for example, you'd NEVER get it to compress visibly. It's also VERY BOUNCY so it sproings all over the place, as you wrestle with leverage tools (e.g., long screwdrivers). There's no room to get a C-clamp on the ends either, as both ends fit into a recessed slot. It's not a 0.5-second job, that's for sure. |
| "Danny D." <dannydiamico@gmail.com>: Feb 19 08:46PM Pico Rico wrote, on Thu, 19 Feb 2015 05:29:02 -0800: > do you have a neighbor that is a MAN? If it was as easy as you're intimating, then this video that Jeff kindly found, would never have been needed. https://www.youtube.com/watch?v=gK7eKakMCz8 That guy did it, and said, verbatim "I'm sure there is some official way to do this, but, I don't know what it is ..." There are two steps that are not intuitive how to do: 1. Compress the spring to get it in place without poking out an eye, and, 2. Setting the chain brake into the unlock position since it has to be in the locked position in order to get the spring in place. Luckily, I know how, and it should work for me, and I'll report back when I try it (after responding to these posts). |
| "Danny D." <dannydiamico@gmail.com>: Feb 19 08:52PM trader_4 wrote, on Thu, 19 Feb 2015 05:57:18 -0800: > forward position, not retracted. IDK what it takes to get that to > retract, but if it's retracted, then less compression of the spring > will be necessary. Thanks. I watched the video Jeff suggested, and I think that method will work as the guy has overcome exactly the two problems that I need to overcome, which are: 1. Compress the spring enough to get it to STAY in the slot (It bounces all over the place because the amount of force is akin to what it takes to move a refrigerator with one hand pressed up against the bottom with the tip of a screwdriver.) 2. Reset the chain brake without the leverage afforded by the chainsaw handle (you have no leverage and you need to spin a very hard to spin little spoked wheel). The force necessary to spin the spoked while is sort of like spinning a lag bolt with just the tip of a screwdriver wedged into one of the hex crests.) But, I'm pretty sure I can do it now, as I know *exactly* how not do to it by now! |
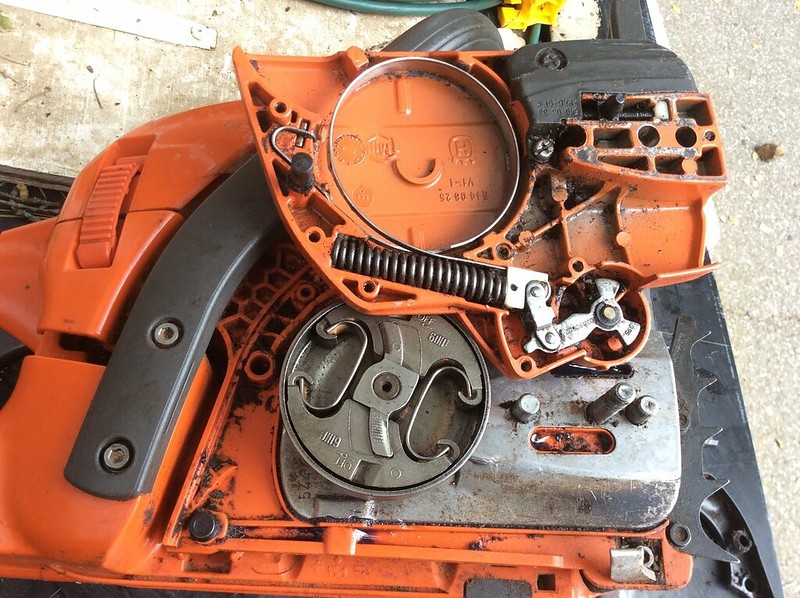
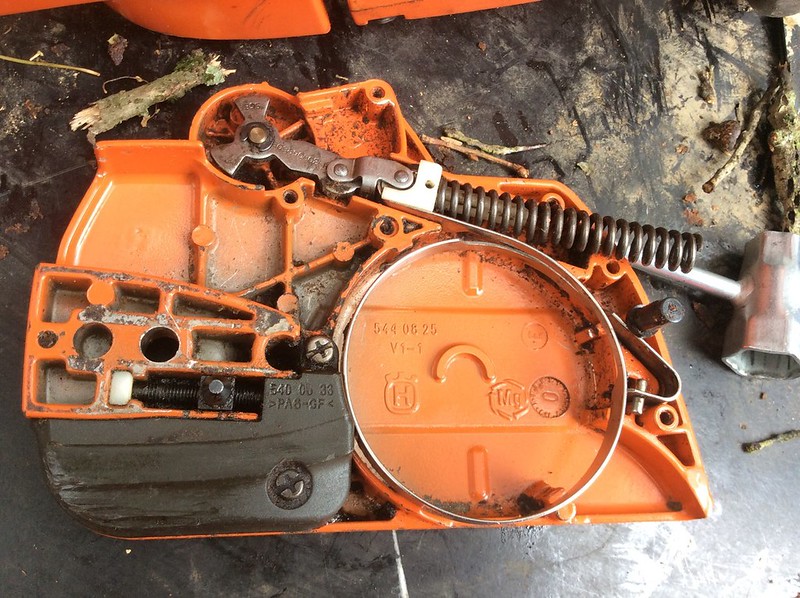
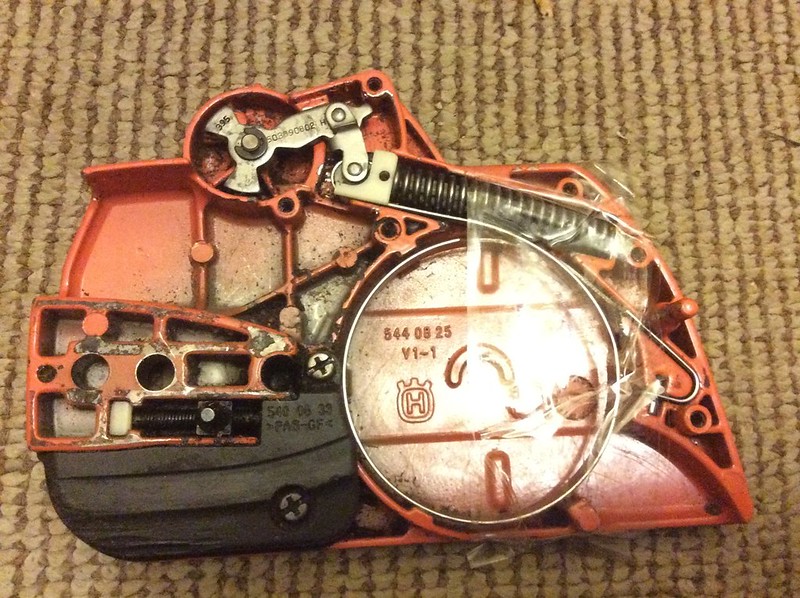
| "Danny D." <dannydiamico@gmail.com>: Feb 19 08:56PM Tom Miller wrote, on Thu, 19 Feb 2015 14:51:26 -0500: > Sorry, I did not explain it clear enough for you to understand. The bolt is > outside of the spring. A tab on the edge of the washer goes to the inside of > the spring. I have compressed automotive springs, so, I know what you're talking about. It's never gonna work in this particular case. There's just no room and the spring is too strong for any metal that would actually fit in between the coils and you can't touch the ends since they fit into a recessed slot. Here it is before it sprung: https://c4.staticflickr.com/8/7322/16388575300_6361db036e_c.jpg Here is the after sprung: https://c4.staticflickr.com/8/7288/16389735629_1cf166b3b8_c.jpg Plus, there is a fragile plastic insert that goes more than 1/3 of the way through the one end. Classic spring compressor? Nope. Not gonna work at all. But, it's a good idea for other applications. |
| "Danny D." <dannydiamico@gmail.com>: Feb 19 08:59PM TimR wrote, on Thu, 19 Feb 2015 11:08:42 -0800: > Big C-clamp, maybe? > You'd want to run a stiff rod in the center to keep it from jumping out. I have a LOT of C clamps. Normally, if you had the room, it might work, but, there is absolutely no way *any* c-shaped spring compressor is gonna work in this application. I think I have it though. The trick is really simple, but it *has* to be done well: 1. You MUST hold down the spring somehow (otherwise it will sproing every time). 2. You MUST leverage on a teeny tiny spot at the END of the spring (only one end)! 3. You MUST then spin the dial, again with leverage on a single point, to unlock the brake without the benefit of the huge brake lever on the saw. Anyway, I think I have it now. I hope to report back success once I finish responding to the posts (just in case a better idea pops up). Thanks for the help and advice. |
| "Ralph Mowery" <rmowery28146@earthlink.net>: Feb 19 04:06PM -0500 "Jeff Liebermann" <jeffl@cruzio.com> wrote in message news:jv2cea5lbuk7gci2nmvi9pkoh1i1i6apfg@4ax.com... >> Here's a video on how to do it: > <https://www.youtube.com/watch?v=gK7eKakMCz8> > He just uses a pair of big needle nose pliers and brute force. As the fellow said there is probably an offical tool to do it. Sometimes it would be nice to see the offical tool and the way the factory puts things together. They probably use an expensive tool that is too much for a one time job, so it is nice to know how to do it at home with minimal tools. |
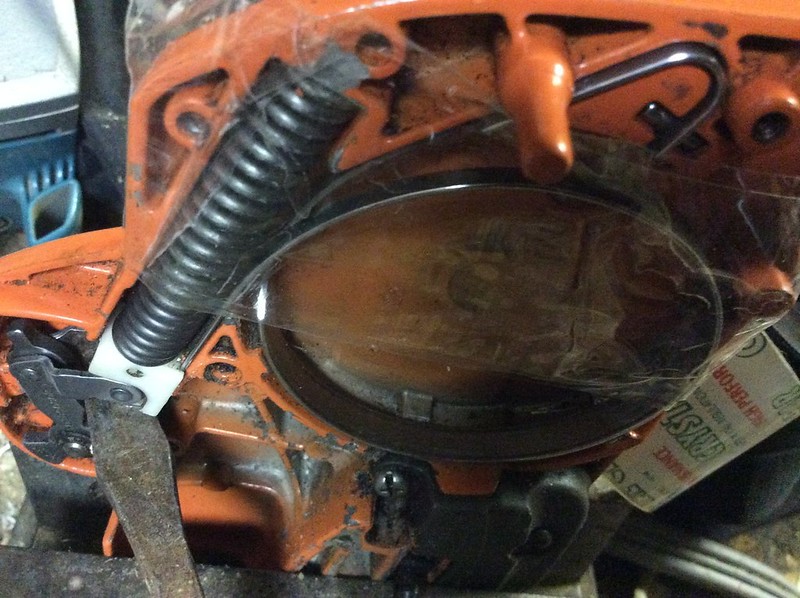
| "Danny D." <dannydiamico@gmail.com>: Feb 19 09:07PM TimR wrote, on Thu, 19 Feb 2015 10:39:36 -0800: > in place, put the jaws of the bar clamp on it, turn the handle to compress. > Good chance of it popping out and nailing you in the face though, > might want to wear goggles. That spring has popped out probably twenty or thirty times already, and, when it flies, it flies. I figured it out, with the help of Jeff's video which explained the two details that I was lacking in my attempts. I didn't use the method the guy used in the video; but I stole all his ideas on what the critical danger spots were. Instead of metal to hold the spring inside, I used packing tape. I bolted the assembly into a vise and then leveraged with a 2-foot long screwdriver on the end of the spring (all smaller sizes failed). You'll notice I leveraged the OPPOSITE end that the guy did in the video that Jeff kindly posted. That leverage, along with the packing tape on the other end, got the spring into the slot without the otherwise inevitable bouncing around the room when the screwdriver inevitably slipped (the force is akin to tilting a refrigerator with the tip of a screwdriver ... nothing you can't handle - but when it slips, the spring goes flying). Here's a re-enactment picture of how I got the spring in place! https://c4.staticflickr.com/8/7306/16388881368_afb75a36fe_c.jpg Notice the screwdriver at bottom left instead of at top right (where the video applied leverage with needle-nose pliers). Now, it's time to spin the brake lock wheel, and I'll be done. Thanks for all your advice! |
| "Danny D." <dannydiamico@gmail.com>: Feb 19 09:15PM Ralph Mowery wrote, on Thu, 19 Feb 2015 16:06:48 -0500: > would be nice to see the offical tool and the way the factory puts things > together. They probably use an expensive tool that is too much for a one > time job, so it is nice to know how to do it at home with minimal tools. Yes. I agree. If Husqvarna supplies a video on how "they" get that spring back in place, that would be informative. Just as you suggested though, just *watching* the video that Jeff supplied taught me to pay extra special attention to three things which were inhibiting success. Armed with that example, I found a *different* way to accomplish getting the spring in place. Instead of leveraging with pliers on the outside end of the spring, I leveraged with a two-foot long screwdriver on the *inside* edge of the spring. https://c4.staticflickr.com/8/7306/16388881368_afb75a36fe_c.jpg And, I used a few wraps of strong packing tape to hold the spring in place on the outside half: https://c1.staticflickr.com/9/8596/16389080810_da0b97e8ab_c.jpg Now all I have to do is spin the wheel of fortune to the left of that photo, which I'll probably do with a screwdriver or pliers as the guy did in Jeff's wonderful video. Thanks! |
| etpm@whidbey.com: Feb 19 02:02PM -0800 >Fucking Christ. Take a Dremel tool and get rid of that shit and just run it. If you ain't strong enough to run a chainsaw, don't run a chainsaw. >Watch your balance, that's all. After watching a friend of mine using his Stihl saw with a chain brake I knew how good they were and are. Every time he set his saw down he would bump the brake with the back of his hand. That way the chain never ran through the dirt. He told me his chains need sharpening way less often since he got a saw with a brake. My Stihl has the brake and a no tool chain adjustment. Both features are great. In over six years of use I never experienced a serious kickback. Last summer though it kicked back hard enough to get the bar about two feet from my face and the brake stopped the chain before the motion of the bar stopped. I am very impressed. But jurb, go ahead and senselessly remove any brake you may have on any saw you own. Eric |
| "Danny D." <dannydiamico@gmail.com>: Feb 19 10:19PM Pico Rico wrote, on Thu, 19 Feb 2015 05:29:02 -0800: > do you have a neighbor that is a MAN? Oren. Can you do me a favor and send Pico Rico pictures of the garage door springs and McPherson struts we've removed, replaced and compressed. He seems to think that those of us endowed with small springs don't also have far larger ones lurking around in our garage that need to be wound ... |
| "Ralph Mowery" <rmowery28146@earthlink.net>: Feb 19 05:49PM -0500 "Danny D." <dannydiamico@gmail.com> wrote in message news:mc5jq4$k1b$8@dont-email.me... . > Now all I have to do is spin the wheel of fortune to the left of > that photo, which I'll probably do with a screwdriver or pliers > as the guy did in Jeff's wonderful video. Sort of reminds me the first time I replaced the drum breaks on my car years ago. I tried using a screwdriver and finally got the spring on after several tries on each wheel. Just as the spring would get near where it was suspose to be, it would slip off. Then next time I was at the auto store I found a special tool that had a hook on it that would go over the stud. Worked just fine the first time. I wonder if the Husqvarna people use somethink like that , or if the spring comes compressed with a string or wire holding it in the compressed state and they cut the string when it is in place. |
| "Danny D." <dannydiamico@gmail.com>: Feb 19 11:19PM TimR wrote, on Thu, 19 Feb 2015 13:17:53 -0800: > nose jaws, I think I've had clamped the needlenose in the vice with > the jaws slightly open and used both hands on the saw to twist the > brake back locked. Well, I chipped off the edge of the cast aluminum, trying to wedge lever the spring into the unlocked position. I think I'll hold tight, as I left the rest of the saw at my neighbor's house. I'm gonna try to see if I can temporarily assemble the brake on top of the saw, and use the saw's own lever, to unlock it. That seems safest, but, I won't go back to that neighbor 'till tomorrow. Luckily, no trees need felling today ... |
| Oren <Oren@127.0.0.1>: Feb 19 03:19PM -0800 On Thu, 19 Feb 2015 22:19:35 +0000 (UTC), "Danny D." >He seems to think that those of us endowed with small springs don't >also have far larger ones lurking around in our garage that need to >be wound ... Sorry I can't today, I'm busy. I would gladly advise him to not let his sprung spring poke his eye out after a spring sprung again. The Jeff video appears to be the best and easiest method without a special tool used by professionals - this is basic DIY stuff. Your packing tape idea was interesting, so I figure it worked. Pico doesn't live in Californication, USA ... You and I are shade tree mechanics! |
| "Danny D." <dannydiamico@gmail.com>: Feb 19 11:20PM Ralph Mowery wrote, on Thu, 19 Feb 2015 17:49:33 -0500: > Then next time I was at the auto store I > found a special tool that had a hook on it Heh heh., I have that tool with the little pigs' tail on the end. Maybe.... just maybe ... it will fit. |
| "Gareth Magennis" <gareth.magennis@ntlworld.com>: Feb 19 08:25PM I'm sick of this shit. Someone brings me a Pioneer mixer or CDJ to repair, and I need to order spares. Get this. A KNOB costs £15. http://www.ebay.co.uk/itm/Pioneer-DJM-700-EQ-Grey-White-Rotary-Knob-DJM700-Low-Mid-Hi-DAA1219-/161064841103?pt=LH_DefaultDomain_3&hash=item2580366f8f How do they get away with this? I have just placed an order for some DJM and CDJ Pioneer spares with a company I used to work for, and THEY quoted me £57.24 for 4 of the above knobs, so this really is the real price. The switches and pots I need cost more than this. Seethe, seethe. I've looked at 3D printers as an alternative, but from the few samples I've seen, the plastic is rock hard and not suitable for a comfy knob, and I don't think its possible to produce a grey knob with a white line pointer anyway. The Pioneer ones I want are squidgy. Gareth. Upset. |
| jurb6006@gmail.com: Feb 19 01:09PM -0800 Yeah, we live in a society in which you get paid more to play than to work, and in which things are worth one tenth the sum of their parts. They gougya. I DO understand business and that they are paying rent on these things and that boxes and all kinds of administrative costs make part cost more apart than when the unit is mass produced. But fifteen bucks is out of line for a knob. Unless the customer is persnickety I would consider replacing them all with sometbing that matches well enough and is a bunch cheaper, maybe even used off a junk unit somewhere. However that doesn't cut it for a bona fide restoration or things like that. And sopme people/shops have a policy that everything is according to the manufacturer. Well they have their clientele and I have mine. Except for the esoteric audiophile type most of them don't give a shit much as long as they can turn the knob. Nice if the all match. |
| "Gareth Magennis" <gareth.magennis@ntlworld.com>: Feb 19 09:52PM wrote in message news:6a868e6b-80ad-412a-ab71-31c7f9b4ca52@googlegroups.com... Yeah, we live in a society in which you get paid more to play than to work, and in which things are worth one tenth the sum of their parts. They gougya. I DO understand business and that they are paying rent on these things and that boxes and all kinds of administrative costs make part cost more apart than when the unit is mass produced. But fifteen bucks is out of line for a knob. Unless the customer is persnickety I would consider replacing them all with sometbing that matches well enough and is a bunch cheaper, maybe even used off a junk unit somewhere. However that doesn't cut it for a bona fide restoration or things like that. And sopme people/shops have a policy that everything is according to the manufacturer. Well they have their clientele and I have mine. Except for the esoteric audiophile type most of them don't give a shit much as long as they can turn the knob. Nice if the all match. That £15 equates to $23 per knob if you live in North America. Trust me, I've been long down this line of replacing knobs/switches etc with stuff you can buy of the shelf, but you just can't, and it just doesn't work, cos the DJ and me can spot the subterfuge a mile off. And this is not some old Pioneer hi-fi, this is Current production Pioneer High End DJ gear for clubs/tours etc. This is the package I have in my workshop right now I need spares for: http://www.djanddiscostuff.com/dj-equipment-c25/multi-format-cdj-c38/single-cdj-c39/cdj-2000-nexus-pair-multi-format-player-with-pioneer-djm-900-nexus-p1497/s1541?utm_source=google&utm_medium=cpc&utm_term=pioneer-cdj-2000-nexus-pair-multi-format-player-with-pioneer-djm-900-n&utm_campaign=product%2Blisting%2Bads&gclid=CJ3emtX-7sMCFQLMtAodWy0A5A The fact is, Pioneer have ensured that their parts are the only ones you can use on their products, and can and do charge what they want. Nice work if you can get it. Gareth. |
| jaugustine@verizon.net: Feb 19 03:19PM -0500 Hi, I never made a NF (Notch Filter), but I am thinking about making a "stub" (I think that's the term) NF for CATV to "block" a single "channel" coming in on the digital TV cable system. Note: This "channel" consists of ANNOYING ads/promos that you can not avoid or "turn off" when you use the "On Demand" feature to look at a list of "on demand" available movies, TV shows, music videos, etc. I know the frequency, which by the way is between 200 and 300Mhz. If I have this correct, the "stub" is a 1/4 wave length of the offending frequency. The 75 ohm coax is cut to that length and is shorted on the far end. The other end is connected via a "T" connector. Also, I don't know if the notch will be "deep" (high Q) enough to make the digital data "un-usable" (can't decode). Another concern is the width of the notch. If it is too wide, it may affect the adjacent channel. Does anyone have any suggestions, or can you recommend a place where I can order a good CATV NF (I am willing to pay)? Thank You in advance, John |
| dplatt@coop.radagast.org (Dave Platt): Feb 19 01:22PM -0800 In article <9lecead9k74vq9h3kie60a0jbak9ieb20t@4ax.com>, > If I have this correct, the "stub" is a 1/4 wave length of the offending >frequency. The 75 ohm coax is cut to that length and is shorted on the far >end. The other end is connected via a "T" connector. If it's a quarter-wavelength long at frequency of interest, then shorting the far end will cause it to behave very much like an open circuit at the "T" at that frequency. A quarter-wavelength transmission line results in the maximum transformation of the impedance from one end to the other. If what you're attempting to do is "short out" the frequency of that one channel, then you'd want either a quarter-wavelength stub which is open at the far end (and these can be tricky due to parasitic capacitance, and could also radiate signals from other channels) or a half-wavelength stub which is shorted at the end. Be aware that any shorted stub is going to look like a short at DC, which might be an issue on some cable systems. > Also, I don't know if the notch will be "deep" (high Q) enough to make >the digital data "un-usable" (can't decode). Another concern is the width of >the notch. If it is too wide, it may affect the adjacent channel. The latter is not at all unlikely. Single-channel filters, deep enough to be useful and shallow enough not to affect adjacent channels significantly, tend to be fairly big and heavy and complex affairs. http://www.tinlee.com/CATV-ChannelEliminator_Single.php?active=1 is one source for them - these are the sort of "big guns" used by CATV companies if they want to knock out one channel, and insert their own content on that frequency. http://www.tinlee.com/NotchTraps.php?category=CATV&active=1 might be more what you'd need. The CR7-(Fo)-HQ line seems appropriate for your need, if the notching is deep enough. I don't think these are designed to have enough attenuation to allow re-use of the same signal (e.g. injecting new content) without interference... they're just designed to attenuate an unwanted signal. > Does anyone have any suggestions, or can you recommend a place >where I can order a good CATV NF (I am willing to pay)? I bought one of TinLee's single-channel units some years ago, when I wanted to notch out Channel 11 from my main over-the-air antenna (pointed north) and insert a separate Channel 11 feed from a Yagi I built (pointed south). It worked very nicely and it survived outdoor weather for as long as I needed it (several years). |
| jurb6006@gmail.com: Feb 19 01:02PM -0800 HA. This was the first time I ever saw SMD emitter resistors fro the outputs. Two 0.4 ohm per transistor, six pairs per channel. There are alot of thoings I don't like about how that thing is designed but oh well. |
| John Robertson <spam@flippers.com>: Feb 19 10:27AM -0800 On 02/18/2015 6:09 PM, Sparky wrote: > volts. > I'll look into wiring and terminal issues. > Thanks to all who helped. Um, the 12V drop would only be if the alternator cable wire was shorted to ground/chassis. You would then be dissipating something like 400 watts through that wire! Ouch!! It is the total resistance of the circuit that counts, not just one part... John :-#)# -- (Please post followups or tech inquiries to the newsgroup) John's Jukes Ltd. 2343 Main St., Vancouver, BC, Canada V5T 3C9 (604)872-5757 or Fax 872-2010 (Pinballs, Jukes, Video Games) www.flippers.com "Old pinballers never die, they just flip out." |
| Mike <news@mjcoon.plus.com>: Feb 19 01:31PM -0600 On Wed, 18 Feb 2015 17:27:55 -0800, Sparky wrote: >> Mike. > He was speaking of when I measured the resistance of the cables and > terminals. Not current. I was assuming it was a multimeter. Low[er] resistance leads on any multi- purpose meter are useful! Mike. |
| You received this digest because you're subscribed to updates for this group. You can change your settings on the group membership page. To unsubscribe from this group and stop receiving emails from it send an email to sci.electronics.repair+unsubscribe@googlegroups.com. |
No Response to "Digest for sci.electronics.repair@googlegroups.com - 25 updates in 5 topics"
Post a Comment