Digest for sci.electronics.repair@googlegroups.com - 3 updates in 1 topic

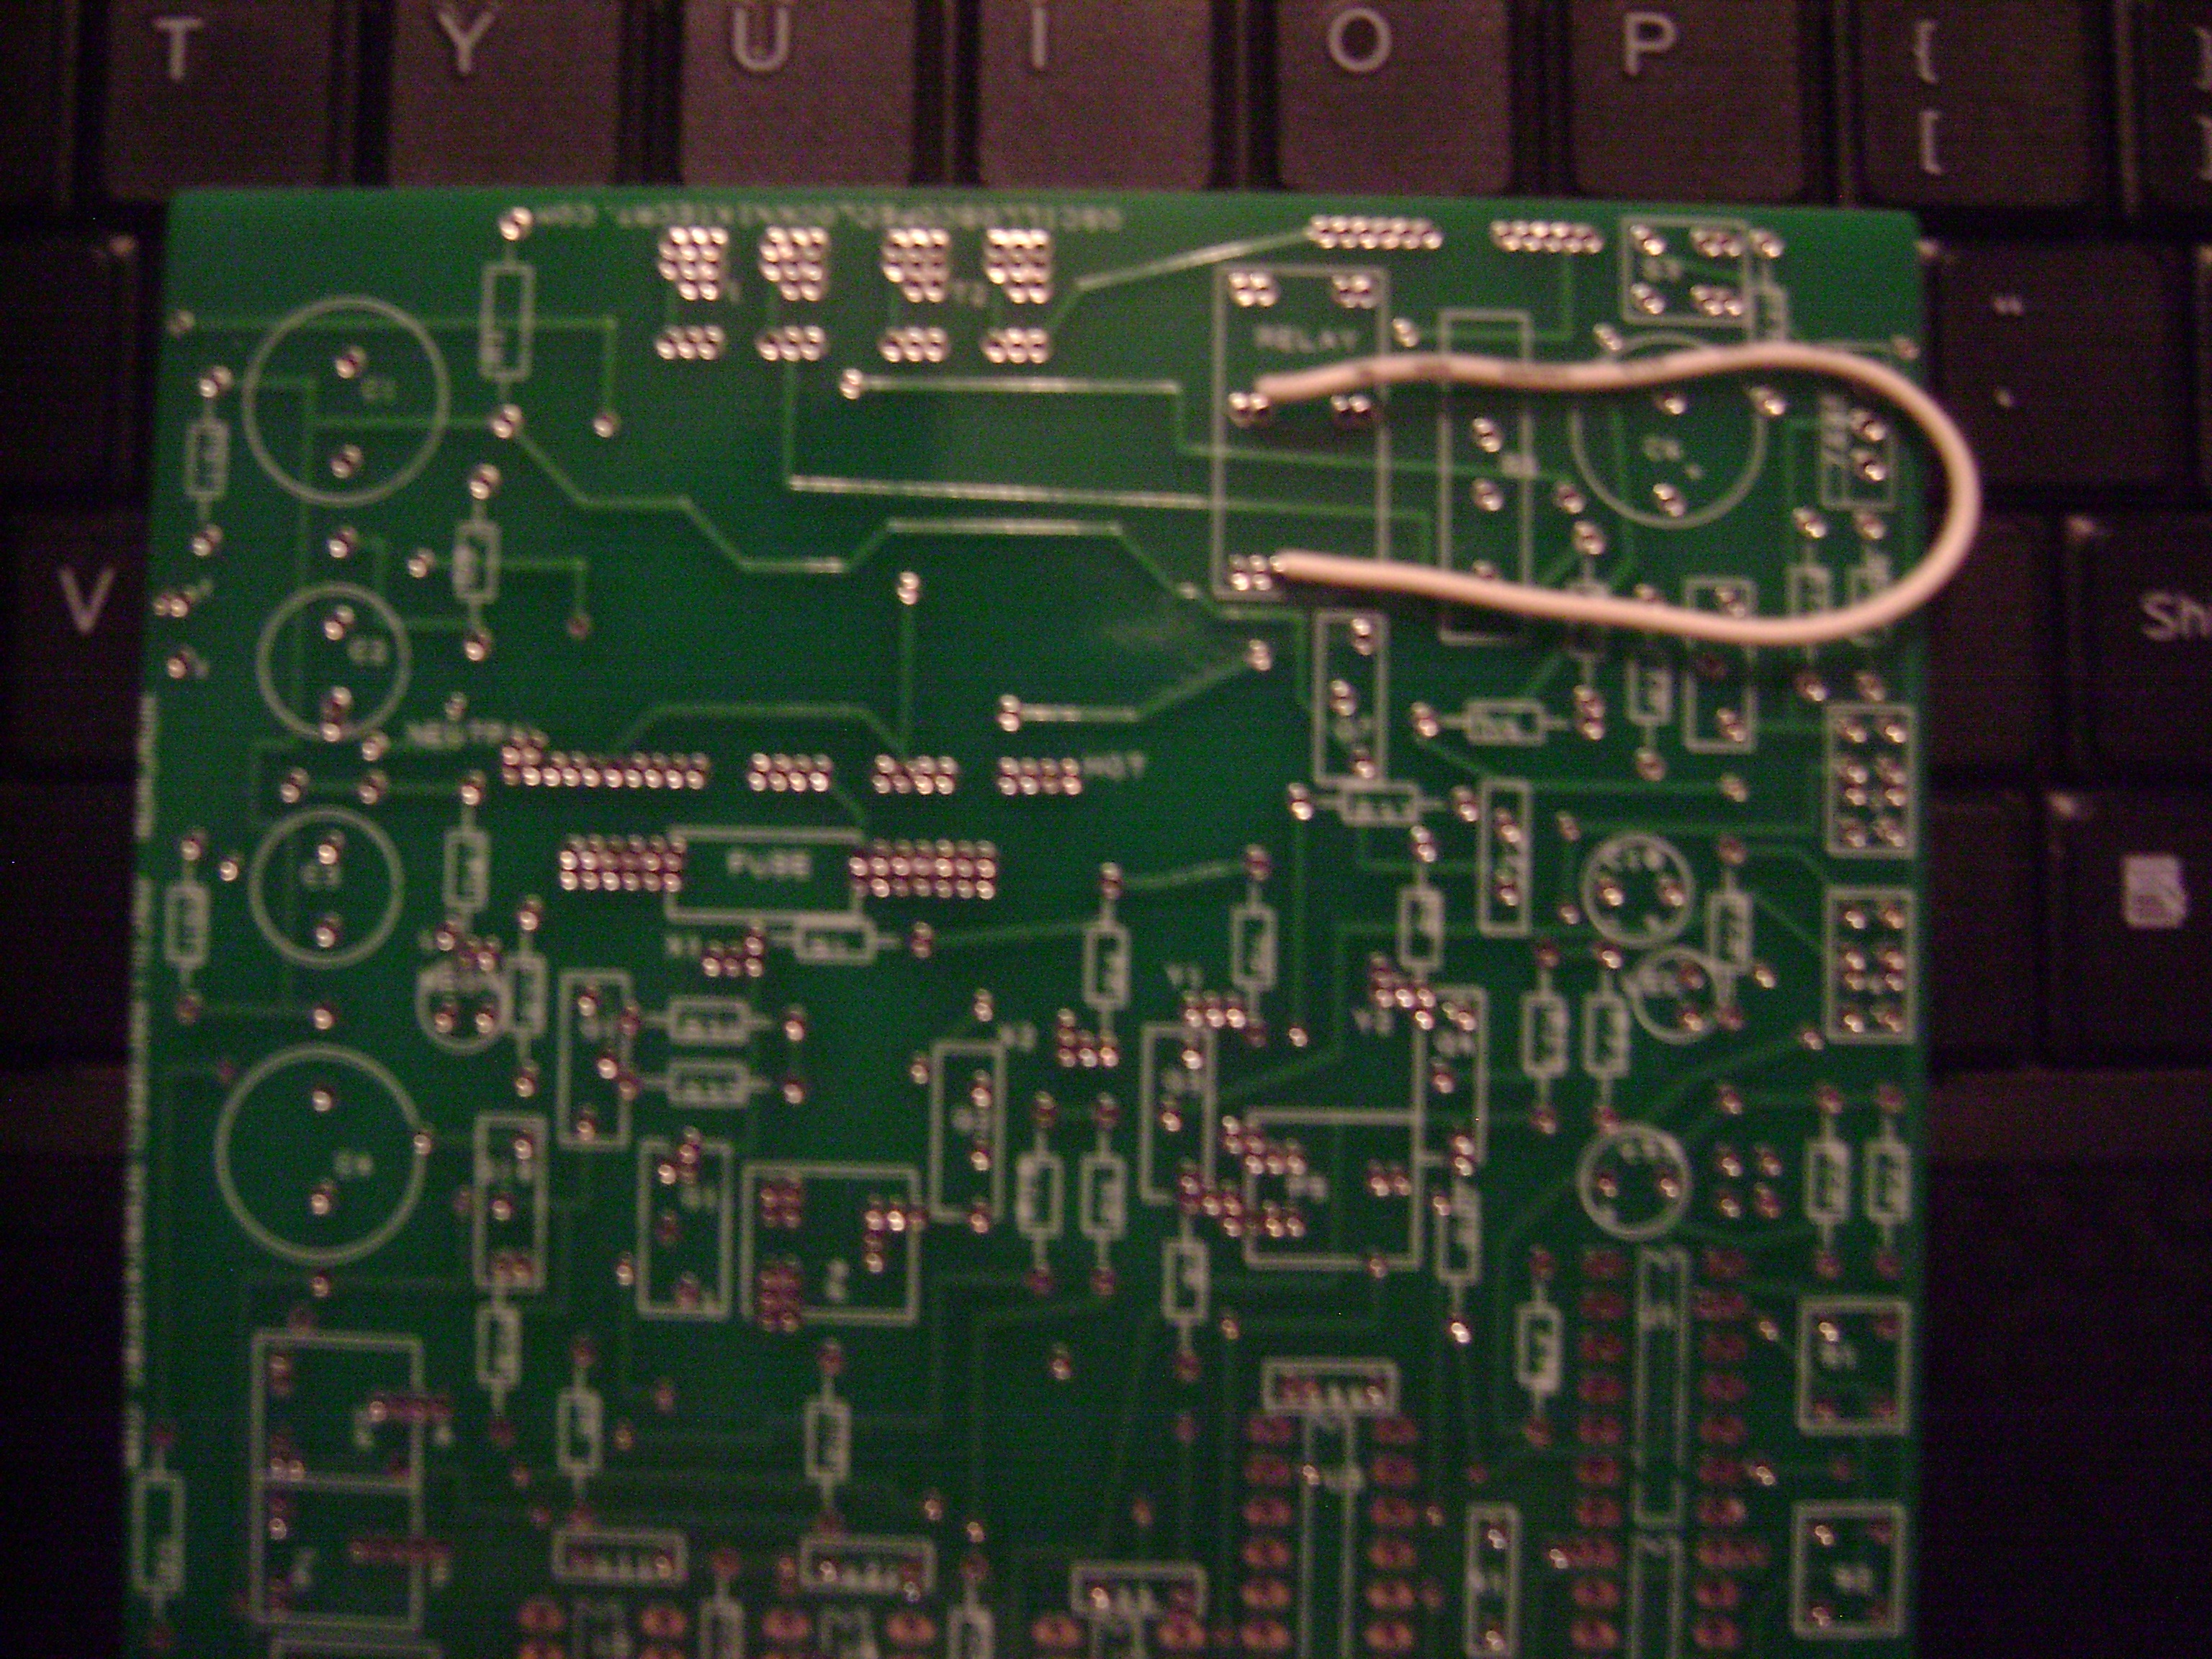
janniebrand@gmail.com: Aug 30 12:31PM -0700

> If it's just the supply that's fried who knows, might work. Can you not find other dumped electronics?
 
So I have some good news ... I managed to find AC-DC adapter that I could change the output voltage on and changed it to 15V and figured I have nothing to loose, so I connected it to the main intercom board, which then power up and the screen came on. Seems to be working 100%.
 
This means that either I have to take out the old SMPS board and just wire this adapter directly to the main board (I suppose not ideal) or I need to find a 220V to 15VDC PCB that will fit in the intercom shell/body (seems to be a bit of a low profile board, since the intercom is very flat).
 
Thanks for the help and I'll definitely try to find some other e-waste that I could use to learn while trying to fix it as well.
ehsjr <ehsjr@verizon.net>: Aug 31 02:37AM -0400


> So I have some good news ... I managed to find AC-DC adapter that I could change the output voltage on and changed it to 15V and figured I have nothing to loose, so I connected it to the main intercom board, which then power up and the screen came on. Seems to be working 100%.
 
> This means that either I have to take out the old SMPS board and just wire this adapter directly to the main board (I suppose not ideal) or I need to find a 220V to 15VDC PCB that will fit in the intercom shell/body (seems to be a bit of a low profile board, since the intercom is very flat).
 
> Thanks for the help and I'll definitely try to find some other e-waste that I could use to learn while trying to fix it as well.
 
I think your plan is a good one. Probably the most economical
way to repair the intercom. Maybe you can find an AC-DC converter
on bidorbuy. Here's an example I found on Ebay:
https://www.ebay.com/itm/AC-DC-Power-Supply-Step-Down-Converter-Module-110V-220V-230V-to-5V-9V-12V-24V-/192281280733
 
Referring to the example above, it might fit if you replace the
caps and bend the leads of the new ones so they lay horizontal.
Assuming the U1 is (or was, before it blew up) a 15V regulator
(which provides only 100 mA), then the example converter
would provide more than enough current at 15 volts.
I don't know what you can get at bidorbuy, but you need
something that provides sufficient current at 15 volts.
The example is mentioned as a reference and a possible method of
modifying whatever you do get to fit.
 
As to the bad supply, save it in case you decide you want
to learn more about switch mode power supplies at some
point in the future. It's nice to read a description of
a circuit and then look at an example of the circuit
you're reading about. Doesn't matter that your circuit is
broken - you know that at one time it was a properly
working switcher. You'll be able to actually see and
identify the various functional portions that are described
in the text. The light bulb turns on "oh, so that's the
common mode choke" or "oh that's the PWM (Pulse Width
Modulation) controller" or "oh that's how they control
the output voltage", etc.
 
Thanks for starting what has been an interesting thread!
Ed
tabbypurr@gmail.com: Aug 31 01:17AM -0700


> So I have some good news ... I managed to find AC-DC adapter that I could change the output voltage on and changed it to 15V and figured I have nothing to loose, so I connected it to the main intercom board, which then power up and the screen came on. Seems to be working 100%.
 
> This means that either I have to take out the old SMPS board and just wire this adapter directly to the main board (I suppose not ideal) or I need to find a 220V to 15VDC PCB that will fit in the intercom shell/body (seems to be a bit of a low profile board, since the intercom is very flat).
 
> Thanks for the help and I'll definitely try to find some other e-waste that I could use to learn while trying to fix it as well.
 
Great news. Reminds me of a Sony TV with a large PSU board. Replaced the lot with a rectfier, caps & lightbulb.... as an experiment. It worked, but not ideally.
 
 
NT
You received this digest because you're subscribed to updates for this group. You can change your settings on the group membership page.
To unsubscribe from this group and stop receiving emails from it send an email to sci.electronics.repair+unsubscribe@googlegroups.com.

Digest for sci.electronics.repair@googlegroups.com - 7 updates in 3 topics

Jannie <janniebrand@gmail.com>: Aug 29 01:48PM -0700

> You asked for a suggestion, I have one. SMPSUs are not the simplest things for beginners, and this one sounds well knackered. I suggest picking up another piece of e-waste & fixing that. You're not gonna fix them all.
 
I have to be honest, I have been thinking the same thing, but I was and still am willing to give a go if it is indeed fixable. It's not like the parts cost that much or like I would be risking breaking it, so even if I screw it up completely, then I'm still at the very least learning something along the way.
 
I do get your point however and I might just throw in the towel if no one can advise as to which "Current Mode PWM Power Switch" I should try (from this link: https://www.mantech.co.za/Stock.aspx?Query=PWM+DIL08and) in order to replace the current "OB2358" part with or if someone can confirm that it's not a part that you could just replace with a similar part from the link.
 
Anyway, it's neither here nor there. I just thought I'd give it a go and hopefully learn something in the process, which I most definitely have so far.
tabbypurr@gmail.com: Aug 29 10:44PM -0700

On Thursday, 29 August 2019 21:48:20 UTC+1, Jannie wrote:
 
 
> I have to be honest, I have been thinking the same thing, but I was and still am willing to give a go if it is indeed fixable. It's not like the parts cost that much or like I would be risking breaking it, so even if I screw it up completely, then I'm still at the very least learning something along the way.
 
> I do get your point however and I might just throw in the towel if no one can advise as to which "Current Mode PWM Power Switch" I should try (from this link: https://www.mantech.co.za/Stock.aspx?Query=PWM+DIL08and) in order to replace the current "OB2358" part with or if someone can confirm that it's not a part that you could just replace with a similar part from the link.
 
> Anyway, it's neither here nor there. I just thought I'd give it a go and hopefully learn something in the process, which I most definitely have so far.
 
I don't think you've got enough info to fix it. You might be lucky but too often power parts are killed by something else going wrong. You've got a relatively complex supply, many fried parts, no idea what caused the failure and you don't know what the parts even are. I'd move on at this point.
 
 
NT
janniebrand@gmail.com: Aug 30 03:12AM -0700

> I don't think you've got enough info to fix it. You might be lucky but too often power parts are killed by something else going wrong. You've got a relatively complex supply, many fried parts, no idea what caused the failure and you don't know what the parts even are. I'd move on at this point.
 
Fair enough. Thank you for all the help and info. I have certainly learned a few things, which will help me going forward.
 
A last question perhaps, would it be worth a try to see if I can find a working 220v AC to 15v DC board and then just swap the broken one out with the working one and perhaps just do some soldering for the connecting wires? If so, is there anything specific that I should be aware of or look out for?
tabbypurr@gmail.com: Aug 30 09:26AM -0700

On Friday, 30 August 2019 11:12:37 UTC+1, janni...@gmail.com wrote:
NT:
 
> > I don't think you've got enough info to fix it. You might be lucky but too often power parts are killed by something else going wrong. You've got a relatively complex supply, many fried parts, no idea what caused the failure and you don't know what the parts even are. I'd move on at this point.
 
> Fair enough. Thank you for all the help and info. I have certainly learned a few things, which will help me going forward.
 
> A last question perhaps, would it be worth a try to see if I can find a working 220v AC to 15v DC board and then just swap the broken one out with the working one and perhaps just do some soldering for the connecting wires? If so, is there anything specific that I should be aware of or look out for?
 
If it's just the supply that's fried who knows, might work. Can you not find other dumped electronics?
 
 
NT
N_Cook <diverse@tcp.co.uk>: Aug 30 05:21PM +0100

A collection of LCD display readings and their SPI codings with the
repeated sections removed, leaving just 4 "rows" of 3 hex characters
(intervening repeated strings removed for clarity, described earlier in
this thread, would come into play for hundreds /thousands/other rows in
the diplay perhaps).
The first rank all even(eg 2,6,C,8 in the 1.014m reading is the mm
(thousandths) ,0 to 9
The second rank (eg C,D,5,C in the 1.014) is the cm (combined tenths and
hundredths) , 00 to 99
The third rank (eg 0,1,1,0 in the 1.014 or 7,D,7,5 in the 30.190 ) is
the combined units and tens
so 0, 1,2,3 ... 99
going by the pairings of "19" in 30.190 and 2.197, both coded to 9,5,7,3
and "20" in 8.206 and 9.206 , both coded to D,B,D,7
Perhaps someone can see octal coding or something , to avoid determining
two sets of 100 pairings, but so far I've not managed to reduce the
required look-up conversions required.
 
1.014
2,C,0,
6,D,1,
C,5,1,
8,C,0,
 
1.036
6,D,0,
E,D,1,
8,7,1,
C,D,0,
 
2.197
2,9,3,
6,5,2,
4,7,1
4,3,1,
 
 
4.235
6,D,0
6,9,3,
8,F,3,
C,5,0
 
5.265
6,D,1,
6,B,3,
8,E,2,
C,7,1,
 
6.243
6,C,3,
6,9,3,
C,F,2,
4,6,1,
 
7.112
6,8,0
A,5,1
C,5,1
4,0,1,
 
 
8.206
6,D,3,
E,B,3,
8,D,3,
C,7,1,
 
9.206
6,D,1,
E,B,3,
8,D,3,
C,7,1
 
 
10.217
2,C,3,
6,9,5,
4,D,7,
4,4,1,
 
16.388
6,D,3,
E,7,7,
C,F,6,
C,7,1,
 
22.136
6,9,F,
E,5,A,
8,7,5,
C,1,5,
 
26.766
6,9,F,
E,7,B,
8,6,6,
C,7,5,
 
 
30.190
6,9,7,
E,5,D,
4,7,7,
C,3,5,
 
30.191
2,9,7,
6,5,D,
4,7,7,
0,3,5,
 
30.192
6,9,7,
A,5,D,
C,7,7,
4,3,5,
 
30.195
6,9,7,
6,5,D,
8,7,7,
C,3,5,
 
30.196
6,9,7,
E,5,D,
8,7,7,
C,3,5,
 
The 30.19 set was setting up on a tripod and repeated grabbing codings
until I got a repeat reading. This was at dusk, after a sunny day, but
even so over 30m , for 6 readings involving switching off and on again ,
just a spread of 6mm and no guarantee my touching the buttons did not
upset the tripod a bit.
 
--
Monthly public talks on science topics, Hampshire , England
<http://diverse.4mg.com/scicaf.htm>
Paul Drahn <pdrahn@jodeco.com>: Aug 29 09:56AM -0700


> 'Ideal' B+ voltage is determined by the specific tube installed.
 
> Peter Wieck
> Melrose Park, PA
 
I built a two tube radio about 20 years ago using 01A tubes. I put 5
regular 9 volt batteries in series to give 45 volts for the radio.
Worked fine.
 
You know you can plug the 9 volt batteries + to - using the connectors
on top?
 
Paul
tabbypurr@gmail.com: Aug 29 10:42PM -0700

On Thursday, 29 August 2019 17:56:39 UTC+1, Paul Drahn wrote:
 
> You know you can plug the 9 volt batteries + to - using the connectors
> on top?
 
> Paul
 
Not a bad idea. They'd last ages too.
 
 
NT
You received this digest because you're subscribed to updates for this group. You can change your settings on the group membership page.
To unsubscribe from this group and stop receiving emails from it send an email to sci.electronics.repair+unsubscribe@googlegroups.com.

Digest for sci.electronics.repair@googlegroups.com - 6 updates in 3 topics

tabbypurr@gmail.com: Aug 29 02:08AM -0700

On Wednesday, 28 August 2019 16:55:29 UTC+1, Phil Hobbs wrote:
 
> Probably intended for a 67 V B battery.
 
> Cheers
 
> Phil Hobbs
 
Thanks. I may need to make a variable PSU, don't have one that goes high. Or I could just go up in steps with what I've got - that sounds quicker.
 
 
NT
Geo <nhhu-o3hu@dea.spamcon.org>: Aug 29 11:41AM +0100


>Thanks. I may need to make a variable PSU, don't have one that goes high. Or I could just go up in steps with what I've got - that sounds quicker.
 
Just put a few poundland PP3s in series.
"pfjw@aol.com" <peterwieck33@gmail.com>: Aug 29 05:16AM -0700

On Wednesday, August 28, 2019 at 11:55:29 AM UTC-4, Phil Hobbs wrote:
 
> Probably intended for a 67 V B battery.
 
> Cheers
 
> Phil Hobbs
 
'Ideal' B+ voltage is determined by the specific tube installed.
 
Peter Wieck
Melrose Park, PA
Jon Elson <elson@pico-systems.com>: Aug 28 01:51PM -0500

On Mon, 26 Aug 2019 03:11:40 -0700, janniebrand wrote:
 
A lot of these power supplies use some form of a TL431 shunt regulator,
that drives the LED of an optocoupler to control the switch-mode FET
driver.
 
Jon
tabbypurr@gmail.com: Aug 29 02:11AM -0700

On Wednesday, 28 August 2019 11:22:26 UTC+1, Jannie wrote:
 
 
> @whit3rd: Thank you for confirming the TL431 part. Not sure if you meant to paste a link for the optoisolator part, but it is the same link as the one for the TL431 part. @Phil did however mentioned that any "xx817xx" opto-coupler part should work.
 
> > If the diodes are short-circuited, they'll look bad in-circuit; if a multimeter that does diode check is available, use that.
 
> I have tested the diodes in circuit with a multimeter and some of them (D1, D2, D3, D4 & D6) looks bad (shorted), but as mentioned, they could be fine. I can also confirm that the few diodes where I could actually see the number, are in fact 1N4007 diodes. I reckon I just go buy a pack of 10 x 1N4007 diodes with the other parts (once confirmed) and then tackle the diodes tested as shorted in circuit 1 by 1, removing, testing and replacing if needed.
 
You asked for a suggestion, I have one. SMPSUs are not the simplest things for beginners, and this one sounds well knackered. I suggest picking up another piece of e-waste & fixing that. You're not gonna fix them all.
 
 
NT
"Ron D." <ron.dozier@gmail.com>: Aug 28 01:30PM -0700

Totally agree with you on Mcmaster. EssentraComponents now ReidSupply isn't bad either. Digikey has always been good.
 
Mcmaster stuff always arrives very quickly, MSCdirect has raised their prices, but usually I get next day service. Sometimes I pick up locally, if I don't want to pay for postage.
You received this digest because you're subscribed to updates for this group. You can change your settings on the group membership page.
To unsubscribe from this group and stop receiving emails from it send an email to sci.electronics.repair+unsubscribe@googlegroups.com.

Digest for sci.electronics.repair@googlegroups.com - 15 updates in 3 topics

"pfjw@aol.com" <peterwieck33@gmail.com>: Aug 27 09:56AM -0700

After you have handled or been around in the mid-five-figures worth of vintage radios, you will learn not to reason from the specific to the general.
 
Magic words here are:
 
1920s
Home Brew
Single tube
 
a) Suspend all other expectations, and deal with what is in front of you.
O1A tubes come in several shapes, from globe to ST. I have seen one (1) "G" type as well, so anything is possible. There are also several other candidates that would do, including an OO, 30 and 112 amongst others. Some would require a different filament voltage. But, the O1A is/was the go-to as they were very common, and much cheaper than the alternatives.
 
b) Variable capacitors are/were expensive relative to fixed caps. So, your home-brew hobbyist likely picked a fixed cap at some value between that specified for a variable cap.
 
c) Fixed caps are/were expensive relative to nothing - so your home-brew hobbyist 'went without'. He/She (a great many of the earliest hobbyist were girls/women - why? Most of the parts were made by women). He/She was probably listening to a nearby "torch" station with little or no competition, so targeting to a specific frequency would be typical.
 
d) At the time, coils were either wound by the hobbyist or purchased to a specific range. If no plug exists, then your hobbyist was uninterested in, or could not afford that option.
 
e) At the time, there was no 'set standard' for radio parts, connections, hardware nor much of anything else. The typical hobbyist, working on-the-cheap as this one clearly was, would use what was lying around. Which might explain some oddball stuff.
 
f) Note that the standard for *cheap* wire at the time was rubber/gutta-percha insulation. Which would crumble to dust in short order. So, PVC is no surprise.
 
On that one-handed coil - are there any taps on it? Commonly, a poor-man's SW or Airplane frequency coil would be done that way - one end fixed, and then tapped to the standard antenna for the alternate.
 
Summing up, you have the equivalent of a fox-hole radio created with as few expensive parts as possible, following the general idea of the Armstrong circuit, which was 'all the rage' at that time.
 
Peter Wieck
Melrose Park, PA
amdx <nojunk@knology.net>: Aug 27 12:22PM -0500

> A little homemade 1920s 1 valve set with direct heated triode (unmarked). I've traced most of the circuit, looks very simple. Not tried to trace the main coil assembly with its 6 connections yet. The valve has a grid leak resistor for -ve bias without C battery. It runs high R phones, no speaker. 1st question is what sort of HT voltage and/or anode current should I aim for?
 
> NT
 
The people on this forum will be very knowledgeable and happy to help.
> https://antiqueradios.com/forums/index.php
 
Mikek
Chuck <ch@dejanews.net>: Aug 27 01:16PM -0500

On Tue, 27 Aug 2019 09:10:02 -0700, John Robertson <spam@flippers.com>
wrote:
 
>collection. About the size of carry-on luggage these days. Cunningham
>C-299 tubes...
 
>John :-#)#
I had an early 1920s Crosley radio. It had two RCA WD12 tubes which
were retained into their sockets by a rod that projected out of the
tube that was locked into a groove in the tube socket. Tuning was by
a coil on a shaft that one pulled toward or away from a stationary
coil. A multi contact rotary switch selected segments of the AM band.
It used 3 batteries; one for B+, one for the filaments and one for
grid bias. It picked up the 50000 watters in the northeast USA at
night. When I came back home from my first year at a midwest
university, one of my brothers had stolen it and I never saw it again.
tabbypurr@gmail.com: Aug 27 02:19PM -0700


> 1920s
> Home Brew
> Single tube
 
One can't always rule out an amateur builder working to their own outdated technical knowledge. But they clearly know enough to get a radio working, and it's not much more leap to bring the tech up to date.
 
> a) Suspend all other expectations, and deal with what is in front of you.
> O1A tubes come in several shapes, from globe to ST. I have seen one (1) "G" type as well, so anything is possible. There are also several other candidates that would do, including an OO, 30 and 112 amongst others. Some would require a different filament voltage. But, the O1A is/was the go-to as they were very common, and much cheaper than the alternatives.
 
useful to know.
 
> b) Variable capacitors are/were expensive relative to fixed caps. So, your home-brew hobbyist likely picked a fixed cap at some value between that specified for a variable cap.
 
The one fixed cap on the ae input is in series with a variable cap! I suspect the variable was added later. The other controls are nice & symmetrical then then ae input VC is stuck round the side.
 
 
> c) Fixed caps are/were expensive relative to nothing - so your home-brew hobbyist 'went without'. He/She (a great many of the earliest hobbyist were girls/women - why? Most of the parts were made by women). He/She was probably listening to a nearby "torch" station with little or no competition, so targeting to a specific frequency would be typical.
 
My homemade '24 set has lots of caps. But this one is, as you rightly conclude, a total cheapie job. The cabinet is nice but open the lid & it's clearly ill fitted pieces untidily glued together. The rest is similar.
 
Caps however were almost free. Take some paper & a little foil, tie with cotton & wax it and minutes later you have a cap. Any electronics book of the day explains this. A different history piece I have includes an HV cap made with plywood as the dielectric. I've never seen any graphs on how they perform :) I guess it's still cellulose.
 
 
> d) At the time, coils were either wound by the hobbyist or purchased to a specific range. If no plug exists, then your hobbyist was uninterested in, or could not afford that option.
 
> e) At the time, there was no 'set standard' for radio parts, connections, hardware nor much of anything else. The typical hobbyist, working on-the-cheap as this one clearly was, would use what was lying around. Which might explain some oddball stuff.
 
It has 3 knobs, all clearly of the era but all different. I don't know for sure it was that way originally but it would not surprise me.
 
> f) Note that the standard for *cheap* wire at the time was rubber/gutta-percha insulation. Which would crumble to dust in short order. So, PVC is no surprise.
 
I thought bare wire was the usual thing to wire up radio internals then.
 
"Waldo Semon and the B.F. Goodrich Company developed a method in 1926 to plasticize PVC by blending it with various additives. The result was a more flexible and more easily processed material that soon achieved widespread commercial use. "
So it could even be original wiring, though that's not likely.
 
 
> On that one-handed coil - are there any taps on it? Commonly, a poor-man's SW or Airplane frequency coil would be done that way - one end fixed, and then tapped to the standard antenna for the alternate.
 
no taps. Looks like it was hand wound round a convenient round object, some sellotape added to keep it together & that was it. It has its own custom mounting made from the same material as the cabinet, so probably was fitted from the start.
 
 
> Summing up, you have the equivalent of a fox-hole radio created with as few expensive parts as possible, following the general idea of the Armstrong circuit, which was 'all the rage' at that time.
 
> Peter Wieck
> Melrose Park, PA
 
Well, it's a fair bit better than a foxhole set but yes it definitely incorporates some 'whatever' parts, and some not.
 
 
NT
John Robertson <spam@flippers.com>: Aug 27 03:08PM -0700


> It has 3 knobs, all clearly of the era but all different. I don't know for sure it was that way originally but it would not surprise me.
 
>> f) Note that the standard for *cheap* wire at the time was rubber/gutta-percha insulation. Which would crumble to dust in short order. So, PVC is no surprise.
 
> I thought bare wire was the usual thing to wire up radio internals then.
 
There were kit radios of the day that used simple tinned wire. I have
one, a Mercury Super Ten kit (10 'peanut' tubes - superhet) around here
somewhere, but I don't think they are that uncommon.
 
John :-#)#
Fox's Mercantile <jdangus@att.net>: Aug 27 08:13PM -0500

> in 1926 to plasticize PVC by blending it with various additives.
> The result was a more flexible and more easily processed material
> that soon achieved widespread commercial use."
 
PVC insulation on wires wasn't used until the '40s and was mostly
used by the Government for WWII production.
And even at that, there was plenty of wire that was rubber,
although it was covered in braided cotton.
 
The standard wire in the 20's was either rubber covered, bare or
"push back" which was solid copper with a spun cotton or silk
covering that could be Just pushed back" so no fuss to expose
the ends of the wires.
 
> So it could even be original wiring, though that's not likely.
 
Absolutely NOT likely at all in the '20s.
 
 
--
"I am a river to my people."
Jeff-1.0
WA6FWi
http:foxsmercantile.com
tabbypurr@gmail.com: Aug 27 11:54PM -0700

On Wednesday, 28 August 2019 02:13:15 UTC+1, Fox's Mercantile wrote:
> "push back" which was solid copper with a spun cotton or silk
> covering that could be Just pushed back" so no fuss to expose
> the ends of the wires.
 
DCC. The homemade coil is enamelled rather than DCC.
 
 
Phil Hobbs <pcdhSpamMeSenseless@electrooptical.net>: Aug 28 11:55AM -0400

> A little homemade 1920s 1 valve set with direct heated triode (unmarked). I've traced most of the circuit, looks very simple. Not tried to trace the main coil assembly with its 6 connections yet. The valve has a grid leak resistor for -ve bias without C battery. It runs high R phones, no speaker. 1st question is what sort of HT voltage and/or anode current should I aim for?
 
> NT
 
Probably intended for a 67 V B battery.
 
Cheers
 
Phil Hobbs
 
--
Dr Philip C D Hobbs
Principal Consultant
ElectroOptical Innovations LLC / Hobbs ElectroOptics
Optics, Electro-optics, Photonics, Analog Electronics
Briarcliff Manor NY 10510
 
http://electrooptical.net
http://hobbs-eo.com
Baron <baron@linuxmaniac.net>: Aug 27 07:07PM +0100

> (https://imgur.com/a/uBCXjwQ).
 
> Not sure if this helps or makes any difference, but let me know if
> there is anything else that I can check/try.
 
Looking at your pictures, the transformer has been very hot at some
time ! Suggesting a heavy load for some period of time.
 
--
Best Regards:
Baron.
tabbypurr@gmail.com: Aug 27 01:40PM -0700


> Thank you everyone for the amazing help so far. I'm learning so much with this.
 
> I feel like I should've perhaps mentioned that I'm pretty much a beginner when it comes to circuit boards. I've replaced fuses, capacitors and resistors before, after doing some research and finding the correct replacement parts, in order to bring back life to old/broken appliances/toys.
 
useful to know
 
> Also, something else to note is that the local (Cape Town, South Africa) place where I get all my electronic parts is Mantech (https://www.mantech.co.za).
 
A lot of parts can be taken from dead e-junk.
 
 
> I've also followed the advice to remove the remaining epoxy from the chip and look at it under a magnifying glass (unfortunately I don't own a microscope).
 
I'd approach it by looking at the circuit connected to it. That usually makes it clear what a part is.


> @Phil: If I understood you correct, you are saying the because of the blown part, the opto is likely blown as well? If so, which opto should I try to replace it with:
> https://www.mantech.co.za/Stock.aspx?Query=817+optoand
 
> Unfortunately I have no idea what happened as I got this from someone that was throwing it out, since they had already replaced it. I'm trying to see if I can fix it.
 
With mains stuff it's useful to test it by running it in series with a filament lamp if there's a possibliity of shorting.
 
 
> Also, we have had load shedding happening in the past, which would some times have caused voltage spikes when the power came back on.
 
Lots of mains appliances consume a large current surge at switch on, together these reduce mains voltage rather than cause a voltage spike or 'surge'. 'Surges' is one of those topics on which plenty of misinformation is believed.
 
> Don't know if that could've cause something like this to happen? I know people have lost appliances to that, but not sure if it could be related.
 
to all 3 of those points, I doubt it.
 
 
> @whit3rd: So you reckon, I just try to replace the blown part with a TL431 (any particular one from the list? https://www.mantech.co.za/Stock.aspx?Query=TL431and) and then also replace the optoisolator (any particular one from the list? https://www.mantech.co.za/Stock.aspx?Query=817+optoand)?
 
what caused what to blow?
 
> I'll do a check of the diodes. Would testing in circuit be sufficient or should I remove the diodes from the circuit for testing?
 
It varies. In-circuit testing will sometimes tell you they're ok, sometimes not. Far quicker than taking time out of course.
 
 
NT
Phil Allison <pallison49@gmail.com>: Aug 27 04:59PM -0700

janni...@gmail.com wrote:
 
------------------------------
 
> L1620
> 817BL
> W
 
** The "817" part of the number is the main identifier.
 
I would expect any "xx817xx" opto-coupler part on offer to work.


.... Phil
whit3rd <whit3rd@gmail.com>: Aug 27 08:13PM -0700


> That said, with regards to the Fixed Positive Voltage Regulator (15+ V) in a TO-92 package (as mentioned by John & Peter), I found the following options:
 
That's an unlikely part, considering it's right next to the optoisolator.
 
<https://www.mantech.co.za/ProductInfo.aspx?Item=14M7535> is the TL431 part
 
for the optoisolator,
<https://www.mantech.co.za/ProductInfo.aspx?Item=14M7535>
 
> I'll do a check of the diodes. Would testing in circuit be sufficient or should I remove the diodes from the circuit for testing?
 
If the diodes are short-circuited, they'll look bad in-circuit; if a multimeter that does diode check
is available, use that. Otherwise... play around with ranges on an ohmmeter scale, and
find out what a good example diode reads, both forward and reverse, and try to match that.
in a pinch (the diodes look like they're 1N4007) wire 'em in series with two batteries and
a flashlight bulb; should light forward-connected, not backward.
Jannie <janniebrand@gmail.com>: Aug 28 03:22AM -0700

Thank you again to everyone that has been contributing. I really appreciate it so much and I'm learning so much.
 
 
> Can you trace out where the wires go? If it is a regulator, then the center lead will usually go directly to ground (nearly zero ohms to the negative output terminal). If it is a TL431, the left wire (looking at the flat surface with the wires down) will probably go to ground. And if it is a pass transistor, then probably none of the wires connect to the ground.
 
I have tried the above suggestion and the center lead goes to go to ground (nearly zero ohms to the negative output terminal, 1.6 ohms to be exact, but that's the same I get if I directly connect the 2 test leads together). Not sure if this means it's a regulator or if it's still more likely to be a TL431, but I hope this helps.
 
 
> With mains stuff it's useful to test it by running it in series with a filament lamp if there's a possibility of shorting.
 
Thanks for this, I will definitely do the testing with this setup. I'm sure I still have a few old filament lamps in the garage somewhere.
 
I did some more detailed examination of the board on the front/top side with a magnifying glass for any possible damage and found another part with damage, the other IC (marked as U1 on the board).
 
The code on IC is:
H11552
OB2358AP
L d
 
Based on what I found, this seems to be a "Current Mode PWM Power Switch". Not sure which one would be the correct replacement as there are many and not one matching the "OB2358" code (https://www.mantech.co.za/Stock.aspx?Query=PWM+DIL08and). Anyone have any suggestions?
 
Again, I hadn't noticed it before (probably because I assumed the problem was the clearly blown part). I have taken a picture and added it to the album (https://imgur.com/a/uBCXjwQ). You can see there is a crack in the center top side of the chip running down to the bottom right side.
 
I also added an image of the front/top of the board with an overlay of the circuit at the bottom. Don't know if that helps anyone, but it's definitely helped me starting to understand what goes where and the connection between the components.
 
@whit3rd: Thank you for confirming the TL431 part. Not sure if you meant to paste a link for the optoisolator part, but it is the same link as the one for the TL431 part. @Phil did however mentioned that any "xx817xx" opto-coupler part should work.
 
> If the diodes are short-circuited, they'll look bad in-circuit; if a multimeter that does diode check is available, use that.
 
I have tested the diodes in circuit with a multimeter and some of them (D1, D2, D3, D4 & D6) looks bad (shorted), but as mentioned, they could be fine. I can also confirm that the few diodes where I could actually see the number, are in fact 1N4007 diodes. I reckon I just go buy a pack of 10 x 1N4007 diodes with the other parts (once confirmed) and then tackle the diodes tested as shorted in circuit 1 by 1, removing, testing and replacing if needed.
etpm@whidbey.com: Aug 27 11:06AM -0700

I ordered on 8-22 some ABS plastic rod from McMaster-Carr. The
package arrived yesterday but it had some other sort of plastic cut
from plate. So I called sales about 4:30 PM and informed them of the
mistake. This was the first incorect shipment I have received from
McMaster-Carr in at least 30 years of buying from them.
Well, just a few minutes ago, about 11:00 AM, arrives a tube with
the proper plastic rod in it. I totally did not expect an overnight
shipment! Boy, what service! They Rock!
Eric
"pfjw@aol.com" <peterwieck33@gmail.com>: Aug 27 12:30PM -0700

Same general opinion of McC, and for the same general reasons!
 
Peter Wieck
Melrose Park, PA
You received this digest because you're subscribed to updates for this group. You can change your settings on the group membership page.
To unsubscribe from this group and stop receiving emails from it send an email to sci.electronics.repair+unsubscribe@googlegroups.com.

Digest for sci.electronics.repair@googlegroups.com - 16 updates in 2 topics

tabbypurr@gmail.com: Aug 26 07:22PM -0700

A little homemade 1920s 1 valve set with direct heated triode (unmarked). I've traced most of the circuit, looks very simple. Not tried to trace the main coil assembly with its 6 connections yet. The valve has a grid leak resistor for -ve bias without C battery. It runs high R phones, no speaker. 1st question is what sort of HT voltage and/or anode current should I aim for?
 
 
NT
Arid ace <nonsmoker@freedom.smokes.oil>: Aug 26 10:24PM -0500


>A little homemade 1920s 1 valve set with direct heated triode (unmarked). I've traced most of the circuit, looks very simple. Not tried to trace the main coil assembly with its 6 connections yet. The valve has a grid leak resistor for -ve bias without C battery. It runs high R phones, no speaker. 1st question is what sort of HT voltage and/or anode current should I aim for?
 
>NT
 
One triode from that era is the A415. The datasheet lists Va between 20 and
150V, saturation current of 30 mA and default anode current of 3 mA.
John Robertson <spam@flippers.com>: Aug 26 10:21PM -0700

On 2019/08/26 8:24 p.m., Arid ace wrote:
 
>> NT
 
> One triode from that era is the A415. The datasheet lists Va between 20 and
> 150V, saturation current of 30 mA and default anode current of 3 mA.
 
Indeed, you need to know the tube value to be sure, but consider the
cost of batteries of the day and thus the B+ is likely 45VDC or thereabouts.
 
In those days some people made their own B+ batteries - way back when I
was a kid digging through attics in Toronto (mid 1960s) for old battery
sets I found a couple of home-made lead acid batteries that were glass
test tubes about 8 inches long mounted in a wooden box and there must
have been 15 to 20 in each case. Wish I still had them as they were
classic home-brew stuff which I always loved from the battery age of radio.
 
John :-#)#
 
--
(Please post followups or tech inquiries to the USENET newsgroup)
John's Jukes Ltd.
MOVED to #7 - 3979 Marine Way, Burnaby, BC, Canada V5J 5E3
(604)872-5757 (Pinballs, Jukes, Video Games)
www.flippers.com
"Old pinballers never die, they just flip out."
Phil Allison <pallison49@gmail.com>: Aug 26 11:44PM -0700

John Robertson wrote:
> test tubes about 8 inches long mounted in a wooden box and there must
> have been 15 to 20 in each case. Wish I still had them as they were
> classic home-brew stuff which I always loved from the battery age of radio.
 
** The "battery age of (tube) radio" extended well into the 1960s.
 
Popular "portables" of that era used a pair of 45V packs for B+ and a large 1.5V dry cell for tube heaters - all made by "Eveready".
 
Miniature 7 pin tubes like the 1S4 and 1R5 were used - along with a transformer supply for home use with a multi-finned selenium rectifier.
 
https://www.radiomuseum.org/tubes/tube_1s4.html


..... Phil
"J.B. Wood" <arl_123234@hotmail.com>: Aug 27 06:44AM -0400

On 8/27/19 2:44 AM, Phil Allison wrote:
 
 
> https://www.radiomuseum.org/tubes/tube_1s4.html
 
> ..... Phil
 
Hello, and I once owned a Red case 4-tube (1R5, 1U4, 1U5, 3Q4)
Westinghouse H-496P4 AM-band portable that used a 67.5 volt B-battery.
The radio had a large speaker and sounded real nice but that B-batt was
expensive. Sincerely,
 
--
J. B. Wood e-mail: arl_123234@hotmail.com
Jeff Layman <jmlayman@invalid.invalid>: Aug 27 01:40PM +0100

On 27/08/19 07:44, Phil Allison wrote:
 
> Popular "portables" of that era used a pair of 45V packs for B+ and a large 1.5V dry cell for tube heaters - all made by "Eveready".
 
> Miniature 7 pin tubes like the 1S4 and 1R5 were used - along with a transformer supply for home use with a multi-finned selenium rectifier.
 
> https://www.radiomuseum.org/tubes/tube_1s4.html
 
I've still got one of these, bought by my father in 1955:
<https://www.radiomuseum.org/r/pye_p131mbq.html>
 
It still works on mains (I doubt it would be possible to find a decent
B126 90v battery today); I added a miniature earphone socket in the
early 60s. What amazes me is that this cost £13 new at the time - the
equivalent of around £345 today!
 
--
 
Jeff
"pfjw@aol.com" <peterwieck33@gmail.com>: Aug 27 05:45AM -0700

That will, very likely, be an Armstrong-circuit regenerative radio based on a common tube of the day, and what comes immediately to mind is the O1A, a 4-pin triode and good performer.
 
Filament voltage is 5 VDC - polarity not critical.
B+ will be 90 - 135 VDC
Grid voltage will be -4.5 - -9 VDC
 
http://www.bunkerofdoom.com/tubes/syl43/DATA/1943/P20.GIF
 
Overall, those early triodes were not very efficient as compared to "modern" miniatures of the late 1940s and 1950s.
 
Note that this basic design often included a variety of plug-in coils for conventional broadcast, SW and other bands as may have been available at the time. Keep in mind that 'official' regulation of land-based broadcast radio did not start (have teeth) in the US until ~1927. And, pretty much every Tom, Dick, Harry, church, department store and other organization had its own radio station, not to mention thousands of amateurs. So, the concept of staying with any given 'band' was not regulated.
 
Peter Wieck
Melrose Park, PA
tabbypurr@gmail.com: Aug 27 09:04AM -0700

On Tuesday, 27 August 2019 03:22:38 UTC+1, tabby wrote:
 
> A little homemade 1920s 1 valve set with direct heated triode (unmarked). I've traced most of the circuit, looks very simple. Not tried to trace the main coil assembly with its 6 connections yet. The valve has a grid leak resistor for -ve bias without C battery. It runs high R phones, no speaker. 1st question is what sort of HT voltage and/or anode current should I aim for?
 
> NT
 
From all the replies it seems I don't know much, other than to set it for an Ia of about 2-3mA. It's a 4 pin valve with a modern shaped envelope, so could be anything. I guess it's a dull emitter replacing the original bright. There's no filament rheostat.
 
The circuit details are different to the Armstrong version here
https://en.wikipedia.org/wiki/Regenerative_circuit
-it's definitely a reaction set, no doubt there.
 
Apart from an input cap on the aerial there is NO other fixed cap anywhere in the circuit, so it's going to be horribly unstable, as if PFB on the edge weren't unstable enough already.
 
I reckon it owes more to 19 teen design than to late 20s, so I expect a very early 20s set. I expect the ae coupling cap, tuning & reaction will all interact some - not to metion headphone wire position affecting feedback as well. It's gonna be a fun one to use.
 
I presume the coil has a separate winding for the ae, and 2 more winds for the tank & pfb. PFB is controlled by a small varicap.
 
It got rewired at some point with pvc. Can't imagine why. The connections are all 2mm sockets, which seems anachronistic, but everything else is definitely original.
 
There's an extra hand wound coil that's only connected at one end. Can't see where it used to connect to. It connects to the ae input after the ae cap, and afaics the circuit ought to work fine without it in. Who knows.
 
The ae cap pretends to be something else, it's only marked as "the new and improved... stabilizer portable aerial... for better listen" and terminals are marked A & B. Will do some component testing later.
 
 
NT
John Robertson <spam@flippers.com>: Aug 27 09:10AM -0700

On 2019/08/26 11:44 p.m., Phil Allison wrote:
 
> https://www.radiomuseum.org/tubes/tube_1s4.html
 
> ...... Phil
 
Yeah, but I was talking about the time when the primary home radio was a
battery set - prior to battery eliminators and the like...
 
I have a lovely (well, it was lovely at one time, the case needs all new
leather) Radiola 24 which was an early 'portable' radio in my small
collection. About the size of carry-on luggage these days. Cunningham
C-299 tubes...
 
John :-#)#
"jfeng@my-deja.com" <jfeng@my-deja.com>: Aug 26 09:47AM -0700


> Same source for a 15- V regulator as well.
 
> Peter Wieck
> Melrose Park, PA
One more step you can take in an attempt to verify this hypothesis: you might remove the remaining epoxy from the chip and look at it under a microscope. I have seen some chips with part numbers in one of the metal layers. Or you could see that it is too complex to be a simple transistor and complex enough to be a regulator, or something in between like a Darlington.
Piotr Piatek <piotr433@pisi.com.pl>: Aug 26 09:16PM +0200

W dniu 26.08.2019 o 17:09, John Robertson pisze:
> common convention. I would then suspect it may be a 15VDC regulator as
> this is some sort of switch mode power supply.
 
> John :-#)#
 
It's likely a TL431, but I wonder how it could have blown so violently
without some external help, as it is connected to the circuit through
relatively high resistances?
 
Piotr
Phil Allison <pallison49@gmail.com>: Aug 26 03:14PM -0700


> Here is a link with a few photos of a circuit board that isn't working anymore:
> https://imgur.com/a/uBCXjwQ
 
> I have tried searching online, but couldn't find anything that gave me any indication of the specs of the transistor or what transistor to try and replace it with. I also tried to search for the schematic, but couldn't find anything.
 
** Take about 15 minutes to trace that schem yourself.
 
 
> If anyone can perhaps help me identify the blown transistor or perhaps
> point me in the right direction that would be greatly appreciated.
 
** Looking at the copper side of the PCB, I can see the blown 3 pin device is driving the LED inside the opto-coupler for feedback.
 
There is a small heatsink behind the chip, so a TL431 is a good bet.
 
The opto will be cactus too.
 
What happened ?
 
Either the opto flashed over ( very rare ) or a foreign metal object did the trick.
 
 
.... Phil
whit3rd <whit3rd@gmail.com>: Aug 26 04:05PM -0700


> I have tried searching online, but couldn't find anything that gave me any indication of the specs of the transistor...
 
piotr and Phil are correct, it's probably a TL431 (or one of the many clones);
to get it to blow up, takes lots of current (and probably another component
was the cause). Install another TL431, another optoisolator (the four-wire
black rectangle), and certainly check out the
diodes (reverse voltage, if the diodes don't block it, could have done in the TL431).
 
That looks like a single-sided phenolic circuit board; they can get damaged,
so examination for cracks and some care about stress applied when under soldering
heat are in order. The project can benefit from solder-wick and liquid flux.
janniebrand@gmail.com: Aug 27 02:38AM -0700

Thank you everyone for the amazing help so far. I'm learning so much with this.
 
I feel like I should've perhaps mentioned that I'm pretty much a beginner when it comes to circuit boards. I've replaced fuses, capacitors and resistors before, after doing some research and finding the correct replacement parts, in order to bring back life to old/broken appliances/toys.
 
Also, something else to note is that the local (Cape Town, South Africa) place where I get all my electronic parts is Mantech (https://www.mantech.co.za).
 
That said, with regards to the Fixed Positive Voltage Regulator (15+ V) in a TO-92 package (as mentioned by John & Peter), I found the following options:
https://www.mantech.co.za/ProductInfo.aspx?Item=14M8346
https://www.mantech.co.za/ProductInfo.aspx?Item=14M8345
https://www.mantech.co.za/ProductInfo.aspx?Item=14M4528
 
I've also followed the advice to remove the remaining epoxy from the chip and look at it under a magnifying glass (unfortunately I don't own a microscope).
 
I have uploaded some new images (viewed through the magnifying glass) to the same link (the new pics are at the bottom):
https://imgur.com/a/uBCXjwQ
 
There seems to be no part numbers on the metal layers. I'm also not informed enough to know whether it is "too complex to be a simple transistor and complex enough to be a regulator, or something in between like a Darlington". To my untrained eye it seems pretty simple, so maybe a transistor then?
 
With regards to the TL431 (as mentioned by Piotr, Phil & whit3rd), I could find a few options at Mantech, but not sure which one could work:
https://www.mantech.co.za/Stock.aspx?Query=TL431and
 
With regards to the opto-coupler (mentioned by Phil), I've added a photo of that as well (https://imgur.com/a/uBCXjwQ), the code on the opto-coupler is:
L1620
817BL
W
 
@Phil: If I understood you correct, you are saying the because of the blown part, the opto is likely blown as well? If so, which opto should I try to replace it with:
https://www.mantech.co.za/Stock.aspx?Query=817+optoand
 
Unfortunately I have no idea what happened as I got this from someone that was throwing it out, since they had already replaced it. I'm trying to see if I can fix it. It is from the handset/monitor side of the intercom system, so maybe it came loose of the wall mounting and took a heavy knock? Also, we have had load shedding happening in the past, which would some times have caused voltage spikes when the power came back on. Don't know if that could've cause something like this to happen? I know people have lost appliances to that, but not sure if it could be related.
 
@whit3rd: So you reckon, I just try to replace the blown part with a TL431 (any particular one from the list? https://www.mantech.co.za/Stock.aspx?Query=TL431and) and then also replace the optoisolator (any particular one from the list? https://www.mantech.co.za/Stock.aspx?Query=817+optoand)?
 
I'll do a check of the diodes. Would testing in circuit be sufficient or should I remove the diodes from the circuit for testing?
janniebrand@gmail.com: Aug 27 03:12AM -0700

I did a bit of a detailed examination of the board with a magnifying glass for any possible damage.
 
I found something on the back of the board that I hadn't noticed before (probably because of the blown part on the front). It seems like there might have been a short between a resistor (R20) and a diode (D4). I have taken some pictures and added it to the album (https://imgur.com/a/uBCXjwQ).
 
Not sure if this helps or makes any difference, but let me know if there is anything else that I can check/try.
"jfeng@my-deja.com" <jfeng@my-deja.com>: Aug 27 06:57AM -0700

> enough to know whether it is "too complex to be a simple transistor and
> complex enough to be a regulator, or something in between like a Darlington".
> To my untrained eye it seems pretty simple, so maybe a transistor then?
To my eyes, it looks like there is no remaining silicon there at all (maybe it got destroyed explosively when it blew off the epoxy) and all you have left are the wire leads. The wires alone do not tell you much.
 
Can you trace out where the wires go? If it is a regulator, then the center lead will usually go directly to ground (nearly zero ohms to the negative output terminal). If it is a TL431, the left wire (looking at the flat surface with the wires down) will probably go to ground. And if it is a pass transistor, then probably none of the wires connect to the ground.
You received this digest because you're subscribed to updates for this group. You can change your settings on the group membership page.
To unsubscribe from this group and stop receiving emails from it send an email to sci.electronics.repair+unsubscribe@googlegroups.com.

Digest for sci.electronics.repair@googlegroups.com - 15 updates in 3 topics

Jeff Liebermann <jeffl@cruzio.com>: Aug 25 10:37AM -0700


>>>>>So I built a kit that uses an electrostatic deflection CRT for the
>>>>>display. It all turned out very well except the display is much more
>>>>>in focus on one side of the screen.
(...)
>If not I can lock the display to just showing digits. Then I can
>adjust the astigmatism and see if the digits on the right hand side of
>the display get sharper.
 
Is the scope really a kit? How old? I've had a bit too much
entertainment value from old carbon composition resistors that absorb
moisture and change value. It might be worth checking the resistance
of some of the resistors in the focus/astigmatism circuit. For
example, here's something similar caused by an open 332K resistor:
<https://cromwell-intl.com/radio/tek2445a.html>
This is going to be difficult without a schematic. If you run out of
options, perhaps tracing the focus/astigmatism circuit, measuring
voltages, and scribbling a schematic might be useful.
 
>I can also swap the X axis wires, which mirror images the display.
>I know because I already did this accidently. If the focus problem
>mirrors too then I wonder what that would mean.
 
I don't know for sure, but your logic seems sound. If the astigmatism
problem remains the same, then the problem might be in the tube. If
it changes when the X deflection leads are reversed, it's in the
circuitry.
 
>I'll try the astig. adjustment first later today.
 
I've been trying to find a reasonable explanation of how the focus and
astigmatism adjustments function. As near as I guess from what little
I've found, the astigmatism adjustment compensates for axial symmetry
errors in the electron gun. That brings up the possibility that the
CRT might be sufficiently unsymmetrical to not allow astigmatism
correction, or that the circuit or parts are so screwed up so as to
not provide sufficient adjustment range.
 
From the TEK 5440 manual:
To check for proper setting of the Astig control, slowly turn
the FOCUS control through the optimum setting with a signal
displayed on the CRT screen. If the Astig control is correctly
set, the vertical and horizontal portions of the trace will
come into sharpest focus at the same position of the FOCUS
control.
 
...front-panel FOCUS and internal astigmatism controls have
been incorporated for arriving at an optimum CRT display.
FOCUS control R440 provides the correct voltage for the second
anode in the CRT. Proper voltage for the third anode is
obtained by adjusting Astig control R370. In order to
obtain optimum spot size and shape, both the FOCUS and Astig
controls are adjusted to provide the proper electrostatic
lens configuration in the CRT.
 
So, how does the vertical astigmatism look? As bad as the horizontal
or different?
 
Not much help, but maybe it will offer some clues.
 
 
--
Jeff Liebermann jeffl@cruzio.com
150 Felker St #D http://www.LearnByDestroying.com
Santa Cruz CA 95060 http://802.11junk.com
Skype: JeffLiebermann AE6KS 831-336-2558
Jeff Liebermann <jeffl@cruzio.com>: Aug 25 10:51AM -0700

On Sat, 24 Aug 2019 20:04:54 -0700 (PDT), Jeff Urban
 
>How can you build an electronic circuit without having the schematic ?
 
I built quite a few Heathkit kits in the distant past that did not
require the use of a schematic. A schematic was provided by Heathkit,
but it was only useful for learning how everything works and for
troubleshooting.
 
I worked for a Heathkit store in the distant past for a few months.
Most of what I found were the wrong parts in the wrong holes in the
PCB. Occasionally, it was missing, extra, or substituted parts.
Amazingly, I did find one design error. Heathkits spent considerable
time and effort to avoid any assembly instructions or documentation
errors. The unspecified manufacturer of this kit might not have been
able to do as good a job. Methinks it might be worthwhile checking if
there are any addendum, corrections, mods, or changes.
 
I can usually find someone else's mistakes rather quickly, but have
had less luck finding my own mistakes. Maybe having someone else
check the CRT circuitry for assembly errors might be useful.
 
Hint: That which is obviously correct, beyond any need of checking,
is usually the problem.
 
--
Jeff Liebermann jeffl@cruzio.com
150 Felker St #D http://www.LearnByDestroying.com
Santa Cruz CA 95060 http://802.11junk.com
Skype: JeffLiebermann AE6KS 831-336-2558
etpm@whidbey.com: Aug 25 11:05AM -0700

On Sun, 25 Aug 2019 10:37:07 -0700, Jeff Liebermann <jeffl@cruzio.com>
wrote:
 
<SNIP>
Yeah Jeff, it really is a kit. Here's the link:
http://oscilloscopeclocknixiecrt.com/Kit.htm
I wish I had traced out the circuit before I populated the board. But
it's double sided and now really hard to see where traces go when they
hide under components.
Eric
etpm@whidbey.com: Aug 25 11:24AM -0700

On Sun, 25 Aug 2019 10:51:23 -0700, Jeff Liebermann <jeffl@cruzio.com>
wrote:
 
>check the CRT circuitry for assembly errors might be useful.
 
>Hint: That which is obviously correct, beyond any need of checking,
>is usually the problem.
I did have someone check my work and he said it should work. And it
does except for the changing focus. I am now thinking that somehow the
voltages need to be changed. The heater voltage is just below the
lowest voltage given on the spec sheet for the CRT.
Nevertheless I am going to go back and check all the solder joints
with a magnifier. And double check all the component values. The weird
thing to me is that the thing works. It just goes out of focus
gradually from one side of the display to the other.
Thanks,
Eric
Jeff Liebermann <jeffl@cruzio.com>: Aug 25 11:40AM -0700


><SNIP>
>Yeah Jeff, it really is a kit. Here's the link:
>http://oscilloscopeclocknixiecrt.com/Kit.htm
 
The video:
<https://www.youtube.com/watch?v=y8ro4a65wk8>
It looks ok. No astigmatism, but plenty of smear (hummm?) on the
digits. However, the photos on the home page:
<http://oscilloscopeclocknixiecrt.com>
and Etsy:
<https://www.etsy.com/listing/167965918/oscilloscope-clock-or-scope-clock-made>
look much sharper.
 
Which CRT tube are you using? The data sheet on the Russian CRT is
not very useful:
<http://oscilloscopeclocknixiecrt.com/OSC42/6Lo1_specs.jpg>
 
There should be some test points on the PCB with Vert, Horiz, and Sync
signals. Connect these to an oscilloscope and reproduce the display.
My guess(tm) is that it will either be perfect, which simply validates
that you assembled most of the PCB correctly, or full of hum or
oscillations, which suggest a circuit problem.
 
The aforementioned test won't do anything for testing the hi-v and CRT
circuitry. However, there may be additional test points or inputs
that can directly drive the vertical and horizontal amplifiers. This
doesn't really prove anything or eliminate any possibilities, but it
might be interesting to try.
 
>I wish I had traced out the circuit before I populated the board. But
>it's double sided and now really hard to see where traces go when they
>hide under components.
 
I like to shine a flashlight from the circuit side so that I can see
the traces. However, you're right that it would have been easier to
do with a bare PCB. Maybe you can convince the seller to send you a
photo or paper copy of the PCB? Here's a useless out of focus photo
of the component side:
<http://oscilloscopeclocknixiecrt.com/OSC42/HVJumper.JPG>


--
Jeff Liebermann jeffl@cruzio.com
150 Felker St #D http://www.LearnByDestroying.com
Santa Cruz CA 95060 http://802.11junk.com
Skype: JeffLiebermann AE6KS 831-336-2558
Trevor Wilson <trevor@rageaudio.com.au>: Aug 26 06:14AM +1000

On 26/08/2019 1:57 am, Andy Burns wrote:
> Trevor Wilson wrote:
 
>> Try a Rigol DS1054z. A very impressive 'scope for not too much cash
 
> And easily hackable to add extra bandwidth and features.
 
**Yep. Buy the 50MHz model and convert it to 100MHz. Worst thing about
the Rigol is the probes. Truly horrible probes. The worst I've ever used.
 
--
Trevor Wilson
www.rageaudio.com.au
 
---
This email has been checked for viruses by Avast antivirus software.
https://www.avast.com/antivirus
John Robertson <spam@flippers.com>: Aug 25 09:38PM -0700

> gradually from one side of the display to the other.
> Thanks,
> Eric
 
Eric, have you tried contacting the kit maker? It may be a problem with
the kit that he/she wasn't aware of - defective component, etc. It happens!
 
'howchon at hotmail dot com' (from the home page).
 
John :-#)#
 
--
(Please post followups or tech inquiries to the USENET newsgroup)
John's Jukes Ltd.
MOVED to #7 - 3979 Marine Way, Burnaby, BC, Canada V5J 5E3
(604)872-5757 (Pinballs, Jukes, Video Games)
www.flippers.com
"Old pinballers never die, they just flip out."
Jeff Layman <jmlayman@invalid.invalid>: Aug 26 08:05AM +0100

> it's double sided and now really hard to see where traces go when they
> hide under components.
> Eric
 
Rather off-topic, but in one of the pictures (uncaptioned, about 2/3 to
3/4 of the way down, where the clock is on a stepped, wooden base) the
valves are nicely coloured - green on the left, purple top right, and
blue bottom right. I assume these are simply non-functional valves with
a coloured led hidden in the base. Those are pretty unusual colours for
leds; maybe a white led with a coloured filter has been used. And are
the valves non-functional? I would expect the base to get pretty hot
with the filament at that end. Not a good environment for an led.
 
--
 
Jeff
Phil Allison <pallison49@gmail.com>: Aug 26 01:37AM -0700

Jeff Layman wrote:
 
--------------------
> leds; maybe a white led with a coloured filter has been used. And are
> the valves non-functional? I would expect the base to get pretty hot
> with the filament at that end. Not a good environment for an led.
 
** Likely the valves are not operating and the rather bright light is coming from thin ,coloured filament bulbs - as used for xmas decorations and tree lighting.
 
The hole in the bottom of a 9 pin valve base is not very big.


.... Phil
tabbypurr@gmail.com: Aug 26 01:53AM -0700

On Monday, 26 August 2019 08:05:38 UTC+1, Jeff Layman wrote:
> leds; maybe a white led with a coloured filter has been used. And are
> the valves non-functional? I would expect the base to get pretty hot
> with the filament at that end. Not a good environment for an led.
 
LEDs in all sorts of oddball colours do exist, they're just a good bit more money & thus unpopular.
 
 
NT
etpm@whidbey.com: Aug 26 09:13AM -0700

On Sun, 25 Aug 2019 21:38:25 -0700, John Robertson <spam@flippers.com>
wrote:
 
>the kit that he/she wasn't aware of - defective component, etc. It happens!
 
>'howchon at hotmail dot com' (from the home page).
 
>John :-#)#
Yes, I did contact him. He has tried to help but so far nothing.
Eric
janniebrand@gmail.com: Aug 26 03:11AM -0700

Hi Folks
 
I have a Commax CDV-43k/DRC-4L (Stock Code: PI-1176) intercom that isn't working anymore. It seems the power supply board in the intercom (CDV-43K) itself (converting wall power of 220v to 15v) has blown. I think it might be the transistor (see photos: https://imgur.com/a/uBCXjwQ). The suppliers say that it is out of warranty and that I would have to buy a new one.
 
Here is a link with a few photos of a circuit board that isn't working anymore:
https://imgur.com/a/uBCXjwQ
 
I have tried searching online, but couldn't find anything that gave me any indication of the specs of the transistor or what transistor to try and replace it with. I also tried to search for the schematic, but couldn't find anything.
 
If anyone can perhaps help me identify the blown transistor or perhaps point me in the right direction that would be greatly appreciated.
 
Let me know if you require any other information from me.
 
Regards,
Jannie
John Robertson <spam@flippers.com>: Aug 26 08:09AM -0700


> Let me know if you require any other information from me.
 
> Regards,
> Jannie
 
Actually the PCB silkscreen indicates that this is an IC as it is called
"U2", instead of a "Q" designation - Q for transistor and U for IC is a
common convention. I would then suspect it may be a 15VDC regulator as
this is some sort of switch mode power supply.
 
John :-#)#
 
--
(Please post followups or tech inquiries to the USENET newsgroup)
John's Jukes Ltd.
MOVED to #7 - 3979 Marine Way, Burnaby, BC, Canada V5J 5E3
(604)872-5757 (Pinballs, Jukes, Video Games)
www.flippers.com
"Old pinballers never die, they just flip out."
"pfjw@aol.com" <peterwieck33@gmail.com>: Aug 26 09:03AM -0700

On Monday, August 26, 2019 at 11:09:15 AM UTC-4, John Robertson wrote:
 
> common convention. I would then suspect it may be a 15VDC regulator as
> this is some sort of switch mode power supply.
 
> John :-#)#
 
And if this is the case, a TO-92 package, 15+ V regulator is here:
 
https://www.newark.com/on-semiconductor/mc78l15abpg/ldo-voltage-regulator-15v-0-1a/dp/42K1178
 
Same source for a 15- V regulator as well.
 
Peter Wieck
Melrose Park, PA
N_Cook <diverse@tcp.co.uk>: Aug 26 10:47AM +0100

Looks like tenths *.1** is 9,5 for the previous determinations.
Looks like processing for longer distances takes longer and timed-out
for 20M samples so will have to select more when I rerpeat.
Got display readings for 16.388, 26.766, 44.244 and 51.971m but full SPI
only for the shorter pair . I've had a display reading of >70m on this
when playing with the measurer on its own, so there is not an internal
timing/bounding limit to 50m. Resolution to 1mm in 70m but its absolute
accuracy , fixed positions and multiple readings, seems to be about
+/-1cm over 50m for outdoor nighttime atmosphere.
For the moment , as going above 10 involves coding changes in the Q and
T sections and only 2 valid SPI readings so far, staying with the units
decoding table of the previous and extending, maybe
unit/tens ~ SPI R(1) , S (1) , T(1)
1~ 0,1,1
2~ 3,2,1
5~ 1,3,2
6~ 3,3,2
8~ 3,3,3
9~ 1,3,3
10~ 3,5,7
16~ 3,7,6
26~ F,B,6
 
The tenths decoding of the 16... and 26.... agrees with the previous.
For eventual use, I'm only interested in the tens,units,tenths of metres
and then 100/110/120m for the 120m version.
 
--
Monthly public talks on science topics, Hampshire , England
<http://diverse.4mg.com/scicaf.htm>
You received this digest because you're subscribed to updates for this group. You can change your settings on the group membership page.
To unsubscribe from this group and stop receiving emails from it send an email to sci.electronics.repair+unsubscribe@googlegroups.com.